The regular left to right horizontal text direction was often used by any design graphic you have seen. Creating a custom path to the type to follow makes the texts come into life and suggests creativity. So, How to type on a path in Photoshop?
Watch the video below or continue reading.
See also:
- Using the Pen tool
- Basic Shape tool
We can use the pen tool to create freedom path so we can customize whatever we want it to look. Also using the basic shape tool.
How to Type on a Path in Photoshop Using the Pen tool?
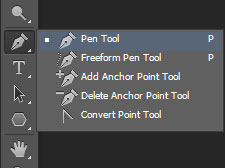
Use the pen tool to create a freedom path. It creates a straight line segment after left clicking. Use the pen tool by left clicking, it will create an anchor point which a line segment is created.
In this tutorial, I will create a simple custom curved path for the type to follow.
This is the final design that we will implement.

First, I will create a red mark so you can see what we will be creating. The red line mark indicates the path we are going to create.

Next, we are going to use the pen tool to implement our line mark.
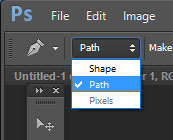
Since I am going to type on a path, I need to change the pen tool into path mode. In this mode, we cannot get the option to add fill or stroke. You can find the option in the top menu (see image below).
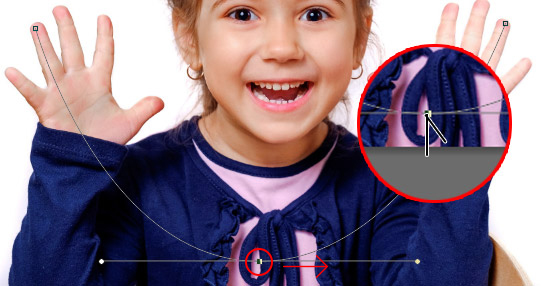
After we change the pen tool mode, I am going to create three points on our image. I did this to we can create a precise or at least balance within the curve path.

Notice some anchors of the path is on point, I’m going to make it curve so our text will not overlap. Using the pen tool, hover over the center point. Hold the ALT/Option key in your keyboard and you will see a triangle cursor symbol(see image below). Click and drag it to the right while holding the shift key until you find the right curved.
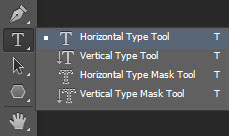
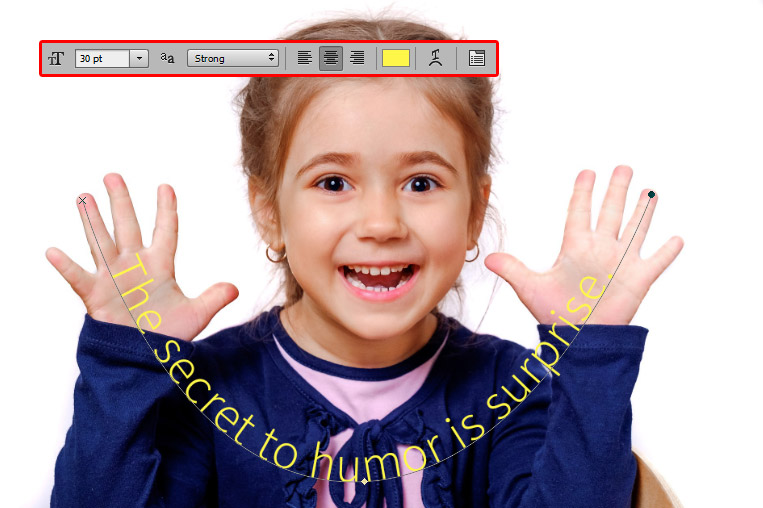
Finally, by selecting the horizontal type tool I am going to hover over to the path and you will see a type on a path symbol(See image below).

Type on a path symbol
Click on it and start adding your texts.

After adding my texts, click on the check mark at the top to commit your current edit. My text was not so appealing so I will change the size, font and color.
This is what I came up with:
What if we want to change a position of the text starting point?
Well, I can by using the path selection tool.
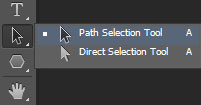
Using the path selection tool
- Change the length path segment
- Flip text on path photoshop
Change the length path segment
When you hover over the path, you will see a type symbol cursor with a triangle flag (See image below).


In your freedom path, if the cursor flag faces to the left it means that it will control the end point of the segment. If it is facing to right, it will control the starting point of your text types.
Flip text on path photoshop
If you want your text to face downwards, use the path selection tool then hover over your path until you’ll see a path selection cursor having a flag symbol and click and hold down. As a result, you will see a flip text on path.

In addition, if you are unable to see the path when selecting the path selection tool, just click on the different layer and click back again to the text layer.
This is the final image I created:
How to Type on a Path in Photoshop Using the Basic shape tool?
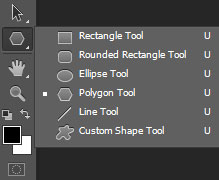
- Rectangle tool
- Rounded rectangle tool
- Ellipse Tool
- Polygon tool
- Line tool
- Custom shape tool
I am going to create a path using the ellipse tool. In the same way, make the tool mode into shape.

I will be going to create the path surrounding the orange object in our image.
First, holding the shift key( to create a perfect circle ), click the center of our object and drag to expand the size of the shape.
Second, select the type tool and hover over the path you just created then click and start typing. Use the path selection tool to adjust the position.

It is pretty much the same process the only thing different is the shape of the path that is going to create.
Style your text the same as the regular horizontal align.
Here are some few examples I made:


Image Credit : https://pixabay.com
In conclusion, you can create text on a path using freedom pen tool or using the basic shapes tool. The pen tool makes it more freely to create custom path while the shape tool might be useful if you want to create a perfect shape path for your text types.