HOT
22bulbjungle
No Result
View All Result
22bulbjungle
No Result
View All Result
Home Graphic Design

How to Fade an Image in Photoshop Easily

in Graphic Design, Photoshop
Reading Time: 3min read
473 5
0
How to Fade an Image in Photoshop Easily

How to Fade an Image in Photoshop Easily

657
SHARES
3k
VIEWS
Share on FacebookShare on Twitter

How to fade an image in Photoshop? Fading an image in Photoshop can be done in a couple of ways. First, using the gradient tool and the other is by eraser tool.

Let’s add the image into a single document. The photo image is the one we are going to fade out and the other element is a background color (It can also be an image) where it stays below the image layer.

RelatedPosts

How to Type on a Path in Photoshop Using Shapes and Pen tool

Make a GIF from a Video Just Like in Tumblr

Adobe Photoshop for Beginners Tutorial (Part one)

Fade an image using the gradient tool

We can use the gradient tool by changing its gradient color. This is the perfect tool to get an even fading effect into any areas of the image.

Since we are going to create the fading effect into nondestructive technique, we are going to use the layer mask instead.

Step 1. Select the image layer. Resize, make it smaller or as desired.

Step 2. Add a layer mask by hitting the icon below the layer’s panel.


Layer Mask Icon

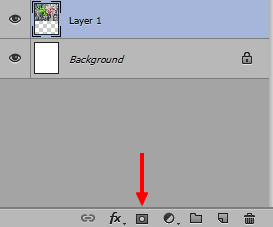
Using the mask, we can have the control over the mistake on erasing if ever it’s going to happen. Erasing it directly into the image layer will remove our chance of editing our image back from its original composition.

The mask just means we are using the foreground color black on our brush. The black color means to remove. If ever you have erased something just replace the black color into the white one (#ffffff) and brush it over to the image so parts will start to appear.

Read also:

  • How to Type on a Path in Photoshop Using Shapes and Pen tool
  • Make a GIF from a Video Just Like in Tumblr

Try to use your brush into the image and you will see how it works.

How Layer Mask Works

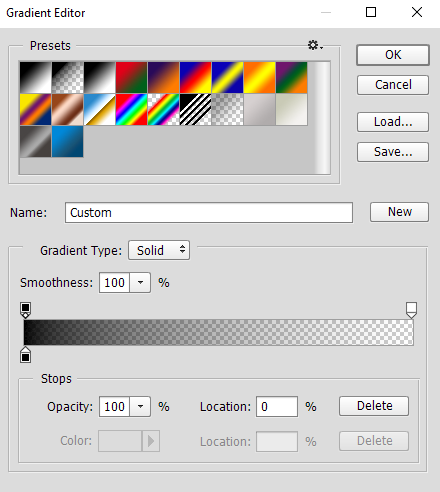
Step 4. Next, select the gradient tool.

For its colors, choose the black into a transparent gradient. This is important because we are using a layer mask.

Gradient Editor

Step 5. At the bottom edge of the image, you can start masking.

Click and drag up using the gradient tool by holding the shift key.

Fade an Image using layer mask

Make sure to select the layer mask thumbnail.

Layer Mask Thumbnail

How to fade an image in Photoshop using the eraser tool

This technique gives us more freedom on the fading effect.

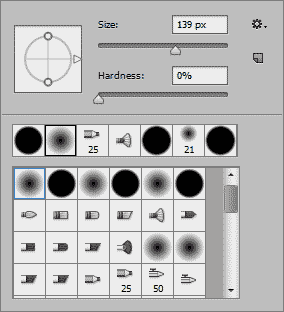
Step 1. First, we should set our brush into a smooth brush.

Smooth brush so it will not show clear edges upon the fade effect.

Smooth Brush Tool

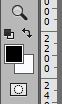
Step 3. Next, make sure the foreground color is set to black or #0000 color code.

Foreground Color

Step 2. Second, we lower our brush flow enough that we can see our desired output fade effect.

The flow option can be found in the top menu after you select the eraser tool.

Put your desired flow value, for this, I am going to use 40%.

Step 3. Use larger brush size so you will get even fading effect with the image

Step 4. Start brushing into the bottom of image areas or wherever you desire.

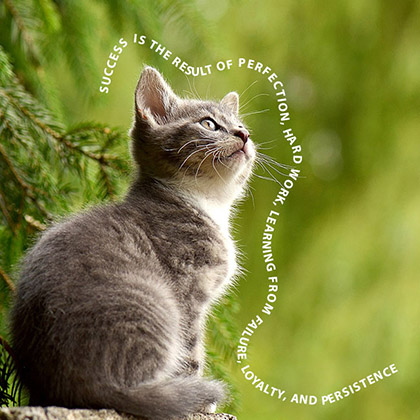
I have added some texts into the composition and this is what I came up to:

How to Fade an Image in Photoshop Easily
The pink panther image source: Pixabay
Tags: Graphic DesignLayer maskLinear-gradientPhotoshopPhotoshop effect
Share263Tweet164Share66

Related Posts

textOnapathThumbnail
Graphic Design

How to Type on a Path in Photoshop Using Shapes and Pen tool

by 22bulbjungle
March 9, 2020
0

The regular left to right horizontal text direction was often used by any design graphic you have seen. Creating a custom path to...

Read more
make a gif from a video

Make a GIF from a Video Just Like in Tumblr

March 9, 2020
photoshop-for-beginners-tutorial

Adobe Photoshop for Beginners Tutorial (Part one)

March 9, 2020
indexed gif photoshop

How to Edit Indexed GIF Image Layer Inside Photoshop

March 9, 2020
How to Create CSS Blurred and Opacity(Transparent) Background

How to Create CSS Blurred and Opacity(Transparent) Background[CODE]

April 12, 2021
How to align content of a div to the bottom

How To Align the Content of a Div to the Bottom with CSS[CODE]

April 12, 2021
How To Setup StackPath CDN With Your WordPress Website

How To Setup StackPath CDN With Your WordPress Website

March 24, 2021
How to Add Custom CSS and JavaScript File in Shopify

How to Add Custom CSS and JavaScript in Shopify (EASY)

March 24, 2021
How To Add Checkout Autofill or Autocomplete Address on the Address Field in WooCommerce

How To Add Checkout Autofill/Autocomplete Address on the Address Field in WooCommerce

March 24, 2021
How to Get Paypal API Credentials (Username, Password, Signature)

[UPDATED 2021] How to Get Your PayPal API Credentials (Username, Password, and Signature to Woocommerce)

March 31, 2021

Free Do it yourself tutorials on CSS, HTML, Photoshop, Wordpress, and Woocommerce to help you learn web development and graphic design.

Follow Us

Recent News

How to Create CSS Blurred and Opacity(Transparent) Background

How to Create CSS Blurred and Opacity(Transparent) Background[CODE]

April 12, 2021
How to align content of a div to the bottom

How To Align the Content of a Div to the Bottom with CSS[CODE]

April 12, 2021

Categories

  • CSS
  • Ecommerce
  • Graphic Design
  • Javascript
  • PC Tips
  • Photoshop
  • Responsive design
  • Shopify
  • Video
  • Web Development
  • Woocommerce
  • Wordpress
  • Home
  • Blog
  • Web Development
  • Graphic Design

© 2021 22BulbJungle.

No Result
View All Result
  • Home
  • Blog
  • Web Development
    • CSS
    • Javascript
    • WordPress
  • Graphic Design
    • Photoshop

© 2021 22BulbJungle.

Welcome Back!

Login to your account below

Forgotten Password?

Create New Account!

Fill the forms below to register

All fields are required. Log In

Retrieve your password

Please enter your username or email address to reset your password.

Log In
This website uses cookies. By continuing to use this website you are giving consent to cookies being used. Visit our Privacy and Cookie Policy.