In today’s fast-paced digital world, website speed and performance play pivotal roles in attracting and retaining visitors.
That’s why integrating a powerful content delivery network (CDN) like BunnyCDN with your WordPress site can be a game-changer.
This blog post will unveil the secrets of effortlessly combining the best of both worlds—BunnyCDN’s lightning-fast global network and your WordPress site—to supercharge your online presence.
Let’s dive in!
Before making any changes to your website, I recommend you create a backup of your wordpress website.
Create a Pull Zone for your WordPress site
Okay, let’s get started by creating a Pull Zone for your website.
Log into your BunnyCDN account and click on “Add Pull Zone”.
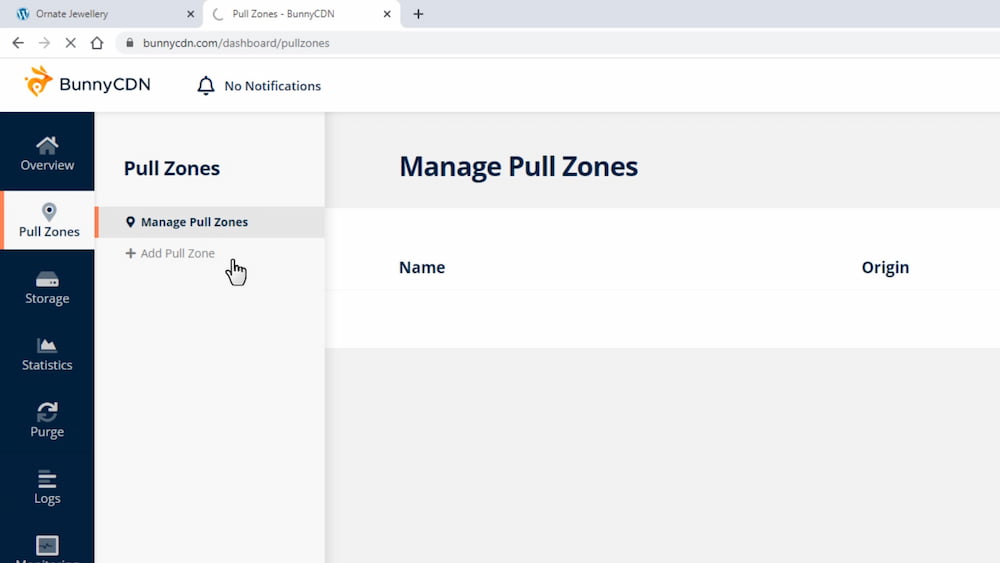
Enter the URL of your website in the “Source URL” field, including the correct protocol (HTTP or HTTPS).
Choose “WordPress” as the platform type.
Take note of the Pull Zone name for later use.
Configure W3 Total Cache plugin
Next, we’ll configure the W3 Total Cache plugin.
You can also use other caching plugin like WP Rocket or anything that has a CDN integration option.
Install and activate the W3 Total Cache plugin on your WordPress website.
Go to the General Settings and enable the CDN.
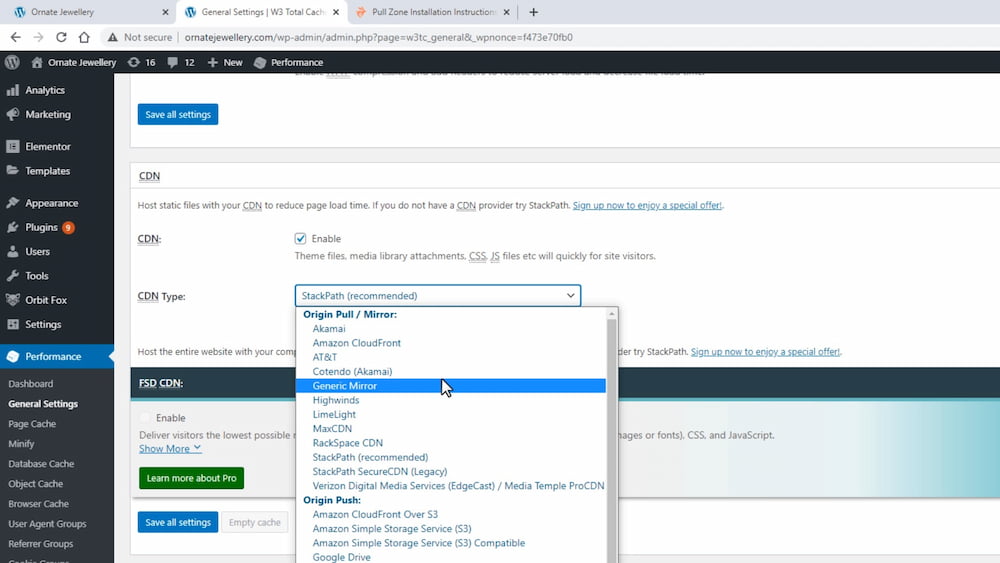
Choose “Generic Mirror” as the CDN type.
Save the settings and purge the caches.
Go to the CDN tab, paste the Pull Zone hostname from BunnyCDN, and save the settings again.
Using the BunnyCDN plugin
Another option is to use the BunnyCDN plugin instead of the W3 Total Cache plugin. This method is just as simple and will give us the same results
Deactivate the W3 Total Cache plugin and install the BunnyCDN plugin.
In the plugin settings, paste the Pull Zone name you copied earlier.
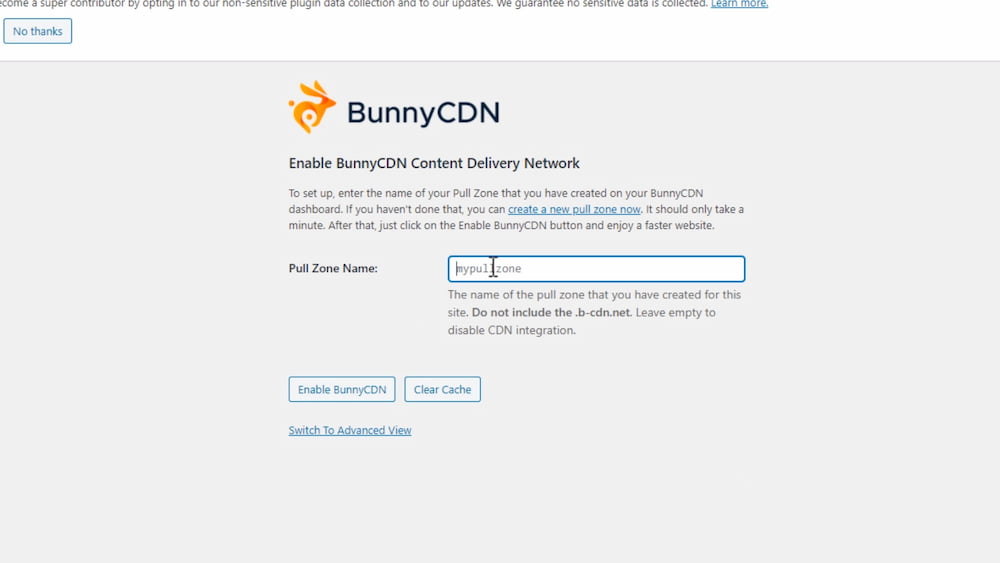
Make sure the Pull Zone name matches the one you created in BunnyCDN.
Save the changes and check if the CDN is working.
Verify that the CDN is working
Finally, we’ll verify that the CDN is working properly. By checking the image source URL, we’ll make sure that our website is fully integrated with BunnyCDN.
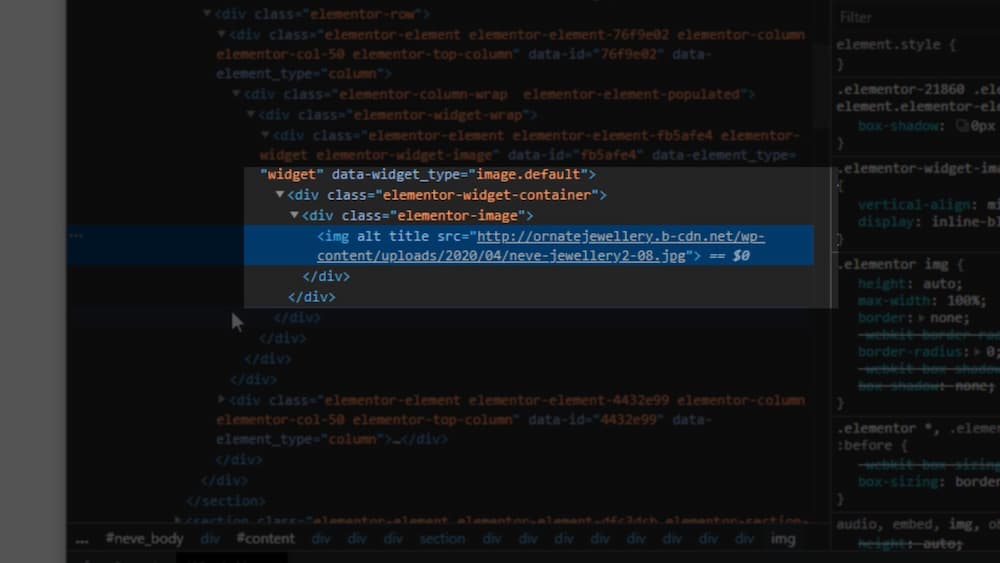
Load your website and inspect an image by right-clicking on it and selecting “Inspect”.
The image source URL should be pointing to the BunnyCDN hostname.
If you have any server-side caching enabled on your website, make sure to deactivate it before creating the Pull Zone.
Conclusion
To sum it up, joining forces with BunnyCDN for your WordPress site is a brilliant tactic.
This integration not only boosts performance and speed but also takes user experience up a notch.
BunnyCDN’s impressive global network lets you cater to a worldwide audience with ease, slashing latency while keeping visitors content.
Heed the step-by-step instructions shared in our post—soon, you’ll master the BunnyCDN plugin and effortlessly integrate it with your WordPress site.
But don’t stop there; keep an eye on how your site fares and adjust settings as needed.
As you embrace BunnyCDN’s integration, your site’s newfound speed, dependability, and security are sure to make waves in today’s fast-paced digital realm.