By default, WordPress doesn’t show you the product categories to be added to the menu. You might only see the options like -Posts- or the Posts categories.
You’ll wonder how can you can your custom product categories from Woocommerce dynamically without using the custom link in WordPress menus.
So, how to add product categories to the WordPress menu?
Here are the steps:
- Go to Appearance > Menus
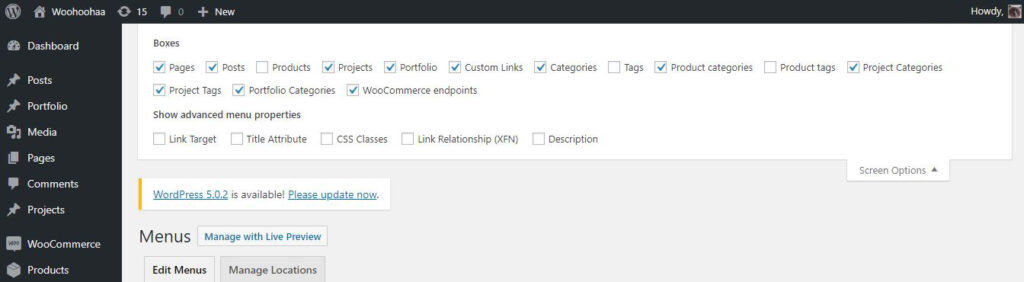
- Look for the Screen Options at the upper right corner of the dashboard. Expand through clicking on it.
- In the boxes, you’ll see a list of checkboxes. We want “Product Categories” to show so we make sure that is checked. It will automatically show it on the edit menu options below.
Also, read: Woocommerce Change Text on Checkout Page | Quick Tutorial
- Now you can add the categories you want on your menu. Make sure to check what menu you are editing. To do that, check your menu name and the display location.
- If you’re not editing the right one, look for Select a menu to edit: option then choose your menu and click on select.
- On the product categories at the left side, select the categories you want to add and then click on the Add to the menu button. These will appear to your selected menu.
- From there you can rearrange your menu depending on your liking by drag and drop.
- You can also make the menu as a dropdown by dragging the menu to the right and drop – this will look indented. The menu above will automatically be the parent menu which shows the indented menu as a drop-down
- Once done, save your menu by clicking on Save Menu button.