![How to Create CSS Blurred and Opacity(Transparent) Background[CODE]](https://22bulbjungle-153fe.kxcdn.com/wp-content/uploads/2021/04/Blur-Opacity-Background.jpg "Blur Opacity Background")
(Video transcription)
Here on my screen on the left, I have my HTML document and on the right is the live browser preview.
I’ve added font variations from google fonts.
To make this easier to understand I made a figure which demonstrates how we are going to achieve this effect.
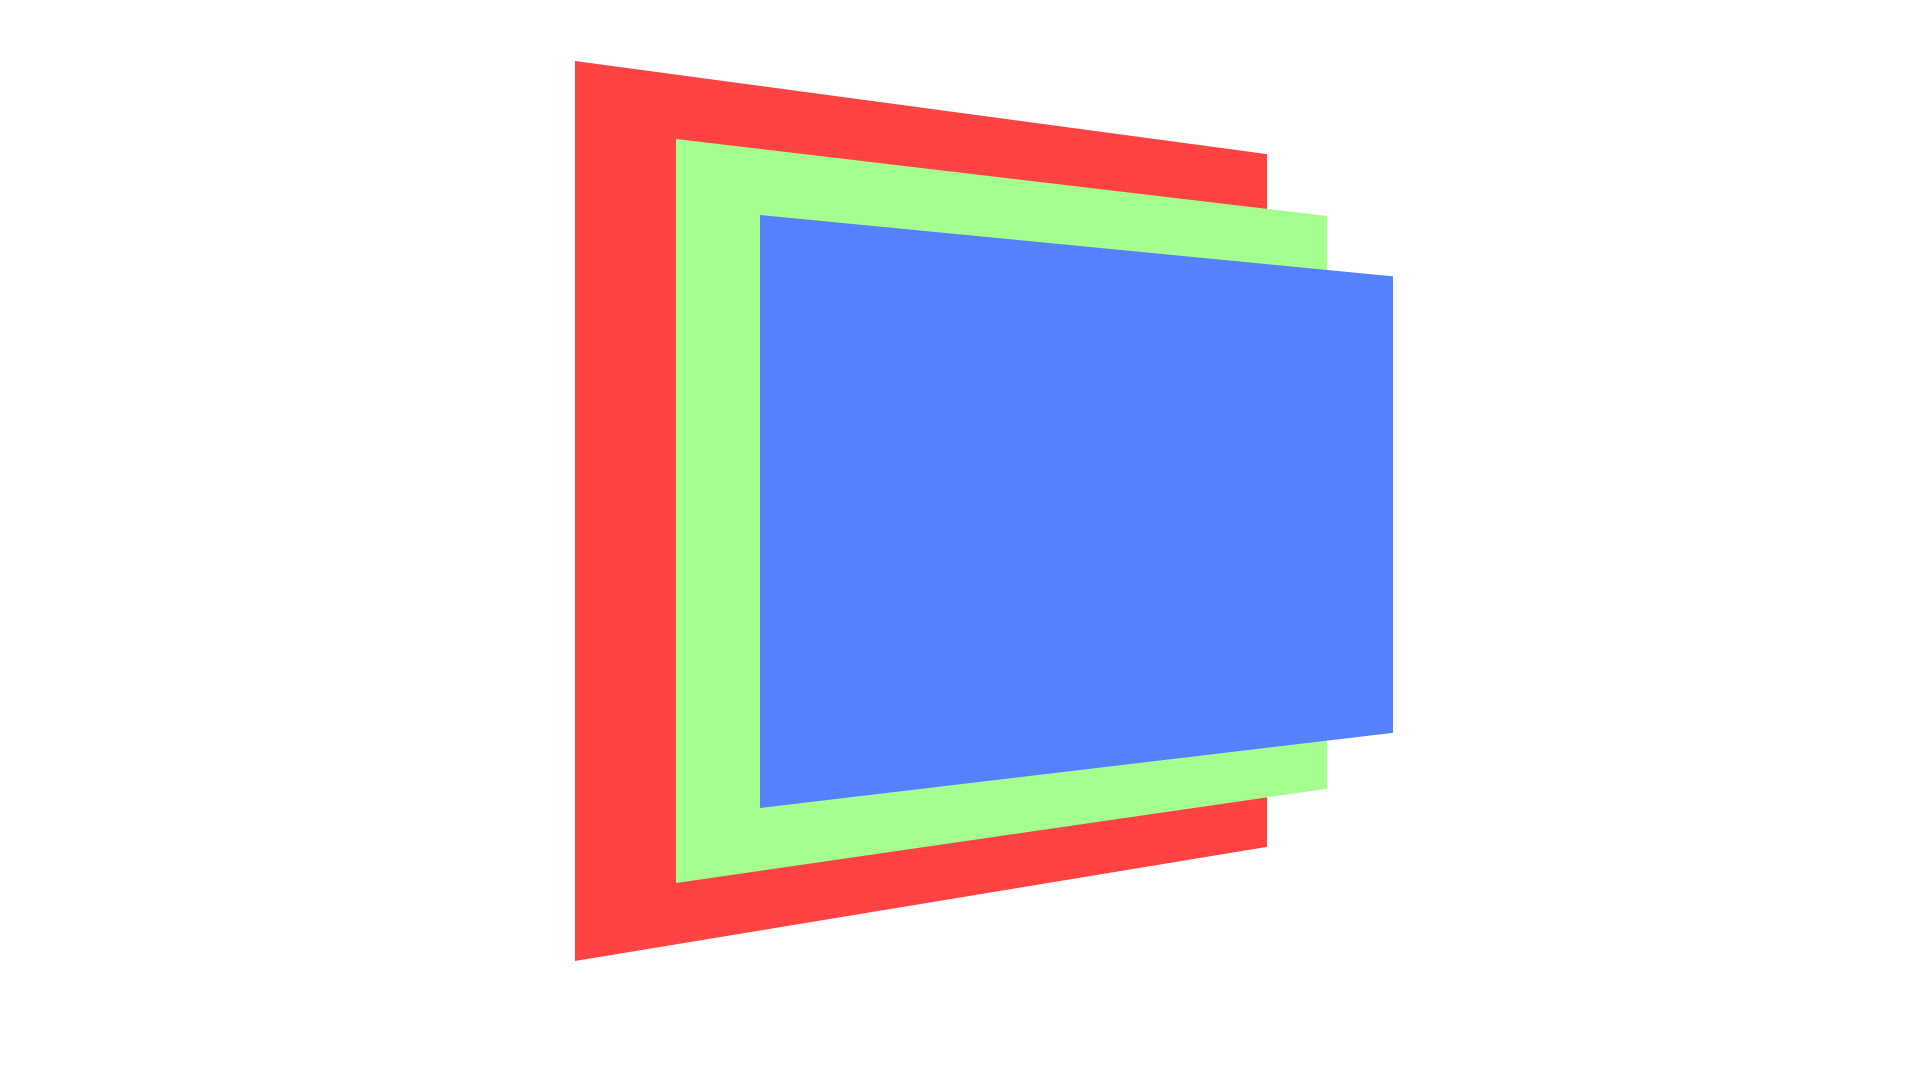
To make this effect, we are going to create layered elements.
The red one will be our container. Inside the container will the image background which is green and the red one is the content.
Create the Markup
Now, let’s create the markup.
The red figure is the section with a class of wrapper.
Next, the green figure – which is the image. So add a div with a class of image bg.
Finally, the blue one – which is the content element.
Add some dummy content.
Adding the Blurred Background
For the wrapper style, add a minimum height of 500px. Add a Border just to see its dimension.
that class should be wrapper and not “section_wrapper” so let’s change that.
For the image background element, add the background image.
It didn’t appear yet since we did not define a width and height.
Because the image background element will be at the back of the content, so let’s add a position absolute CSS and add width and height.
As you notice, the content is not appearing anymore but it’s just at the back of this background. Let’s make it appear at the top as this is the blue element that I showed earlier. First, let’s remove the body’s default margin.
Also, position the background to the top and left.
Positioning CSS Elements
For the blue element which is the content, add a position absolute, a maximum width.
I’m adding a top left right bottom zero and margin auto to make sure that this div element is on the center of our wrapper – the red figure.
We need the absolute positioned image and content element to respect our wrapper. As you remember, we have set a minimum height to the wrapper but the content and image element goes beyond it. What we can do is to add a relative position CSS to the parent element which is the wrapper.
Now it does not go beyond the wrapper div.
I’m going to add some style to our text elements.
I’ll add flex CSS To center the text content inside our blue content element.
Now that’s center, let’s add the blur effect to our image background.
Notice the edges have some little bit of white lines. We can remove this by resizing the image element through scaling.
Add “transform scale”, then “1.1”. You can increase the value, for this one, I think it looks good.
Another problem, the bottom edges look so blurry. To fix this, add overflow hidden to the wrapper red element.
Add some quick styling to the subtexts.
Adding Transparent Background
Finally, to add a transparent or low opacity background to the content, add a background-image property.
Also, add some padding.
Inside the linear gradient function, the first value will be the angle. For this one let’s add 90degrees, comma then the first color stop at zero percent then the second one at 100.
Changing CSS from Developer Tools
I’ve added the red color as a placeholder, we can change it later by defining it using the chrome developer tools.
To access it, right-click on the document preview and hit inspect.
On the elements tab, find the div element to which we added the background.
From here you can click on the color box and chose a different color, for this example, I’ve selected a color from its background image.
I’m going to using the “rgba” variation of the color rather than the Hex value.
Now, we can move down the opacity by dragging the second slider to the left.
Let’s go with 40 percent opacity or .4.
And for the second stop color, change the color and opacity to .5 or 50%.
Let’s select the style and copy it over our CSS and save it. and now we’re done.
Code
<section class="wrapper">

    <div class="image_bg"></div>
    <div class="content_wrapper">
        <div class="content_inner">
            <h1>Perseverance Rover</h1>
            <p class="sub_text">SEEKING PRESERVED SIGNS OF BIOSIGNATURES</p>
        </div>
    </div>

</section>
.wrapper{
            min-height: 500px;
            position:relative;
            overflow: hidden;
        }
        .image_bg{
            background: url(mars_rover.jpg) center/cover no-repeat;
            position:absolute;
            height: 100%;
            width: 100%;
            top: 0;
            left:0;
            filter: blur(5px);
            -webkit-filter: blur(5px);
            transform: scale(1.1)
        }

        .content_wrapper{
            position:absolute;
            max-width: 1170px;
            top: 0;
            left: 0;
            right: 0;
            bottom: 0;
            margin: auto;
            padding: 15px;
            display: flex;
            align-items:center;
            justify-content:center;
        }
        h1{
            color: #fff;
            font-size: 3.5em;
            text-align:center;
            margin: 0 0 .25em;

        }
        .sub_text{
            font-family: 'Roboto', sans-serif;
            color:#fff;
            margin: 0;
            font-size: 1.2em;
            letter-spacing: 2px;
            text-align:center;

        }
        .content_inner{
            background-image: linear-gradient(
90deg
, rgb(220 185 147 / 40%) 0%, rgb(134 80 48 / 50%) 100%);
            padding: 15px;
        }